Android
开发环境搭建
推荐配置如下:
Android Studio 3.X及以上
JDK 1.8及以上
NDK 19.2.5345600
您的应用应满足以下条件
minSdkVersion 23
targetSdkVersion 29
compileSdkVersion 29
buildToolsVersion 30.0.0
Gradle 6.1.1
接入说明
您需要按照如下流程完成应用的开发工作。
License申请
使用算法SDK前需要申请对应的License,否则无法正常使用,具体的申请流程可参考 授权方式 章节。
集成基础SDK
基础SDK主要分为Astra SDK和Orbbec SDK,具体需要根据实际选用的模组来选择基础SDK进行集成,AstraSDK和OrbbecSDK 可通过 耀世注册3D视觉开发者社区 下载最新版本,详细的集成步骤 可参考 基础SDK 部分。
集成算法SDK
Orbbec Pose SDK Android版本可通过 耀世注册3D视觉开发者社区 下载 最新版本,详细集成步骤可参考 算法SDK 部分。
添加权限
开发时需要在AndroidManifest.xml中给应用申请对应的权限:
1<uses-permission android:name="android.permission.READ_EXTERNAL_STORAGE" />
2<uses-permission android:name="android.permission.WRITE_EXTERNAL_STORAGE" />
3<uses-permission android:name="android.permission.CAMERA" />
基础SDK
Astra SDK
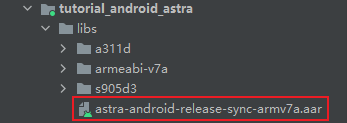
要使用Astra SDK,首先需要导入Astra SDK的aar包到您的应用工程中的lib目录下,导入后记得点击Sync Project with Gradle Files进行更新, 具体如图所示:
SDK使用示例
1.初始化SDK并打开设备
 1// 创建Astra SDK Context并设置设备状态回调
 2mAstraContext = new AstraAndroidContext(mContext, new AstraDeviceManagerListener() {
 3        @Override
 4        public void onOpenAllDevicesCompleted(Iterable<UsbDevice> iterable) {
 5        }
 6
 7        @Override
 8        public void onOpenDeviceCompleted(UsbDevice usbDevice, boolean b) {
 9        }
10
11        @Override
12        public void onNoDevice() {
13        }
14
15        @Override
16        public void onPermissionDenied(UsbDevice usbDevice) {
17        }
18    });
19// 初始化SDK
20mAstraContext.initialize();
21// 打开设备
22mAstraContext.openAllDevices();
2.当设备打开成功后(即onOpenAllDevicesCompleted方法回调后)再设置开流配置
 1ImageStreamMode newMode = null;
 2// 开启默认Sensor
 3mStreamSet = StreamSet.open();
 4
 5// 通过StreamSet创建StreamReader
 6mStreamReader = mStreamSet.createReader();
 7
 8// 通过StreamReader获取ColorStream
 9mColorStream = ColorStream.get(mStreamReader);
10
11// 获取彩色流支持的所有模式
12Iterable<ImageStreamMode> colorVideoModes = mColorStream.getAvailableModes();
13for (ImageStreamMode mode : colorVideoModes) {
14    int X = mode.getWidth();
15    int Y = mode.getHeight();
16    int fps = mode.getFramesPerSecond();
17
18    Log.d(TAG, " support resolution: " + X + " x " + Y + " fps: " + fps + ", (" + mode.getFormat() + ")");
19    // 根据分辨率、格式及帧率进行过滤,得到想要开启的流的模式
20    if (X == RESOLUTION_W && Y == RESOLUTION_H && mode.getFormat() == PixelFormat.RGB888 && fps == FPS) {
21        newMode = mode;
22    }
23}
24if (newMode != null) {
25    Log.d(TAG, "color stream set video mode: " + newMode.toString());
26    // 配置过滤得到的彩色开流模式
27    mColorStream.setMode(newMode);
28}
29
30// 通过StreamReader获取DepthStream
31mDepthStream = DepthStream.get(mStreamReader);
32
33// 获取深度流支持的所有模式
34Iterable<ImageStreamMode> depthVideoModes = mDepthStream.getAvailableModes();
35for (ImageStreamMode mode : depthVideoModes) {
36    int X = mode.getWidth();
37    int Y = mode.getHeight();
38    int fps = mode.getFramesPerSecond();
39
40    Log.d(TAG, " support resolution: " + X + " x " + Y + " fps: " + fps + ", (" + mode.getFormat() + ")");
41    // 根据分辨率、格式及帧率进行过滤,得到想要开启的流的模式
42    if (X == RESOLUTION_W && Y == RESOLUTION_H && mode.getFormat() == PixelFormat.DEPTH_MM && fps == FPS) {
43        newMode = mode;
44    }
45}
46if (newMode != null) {
47    Log.d(TAG, "depth stream set video mode: " + newMode.toString());
48    // 配置过滤得到的深度流开流模式
49    mDepthStream.setMode(newMode);
50}
3.通过StreamSet获取相机内参
1if (null != mStreamSet) {
2    // 获取相机内参
3    mCameraParam = mStreamSet.createDeviceController().GetOrbbecCameraParams();
4}
4.开启彩色流
1mColorStream.start();
5.开启D2C,并打开深度流
1// 开启D2C
2mDepthStream.setRegistration(true);
3
4// 开启深度流
5mDepthStream.start();
6.创建并启动取流线程
1if (null == mStreamThread) {
2    // 创建取流线程
3    mStreamThread = new Thread(mStreamRunnable);
4    mStreamThread.setName("StreamThread");
5}
6// 启动取流线程
7mStreamStart = true;
8mStreamThread.start();
7.取流
 1while (mStreamStart) {
 2    // 刷新流
 3    Astra.update();
 4    // 判断是否有新的Frame
 5    if (mStreamReader.hasNewFrame()) {
 6        // 通过StreamReader获取ReaderFrame
 7        ReaderFrame readerFrame = mStreamReader.openFrame();
 8
 9        // 通过ReaderFrame获取ColorFrame
10        ColorFrame colorFrame = ColorFrame.get(readerFrame);
11
12        // 通过ReaderFrame获取DepthFrame
13        DepthFrame depthFrame = DepthFrame.get(readerFrame);
14
15        // 释放readerFrame资源
16        readerFrame.close();
17    }
18}
8.停流
 1// 停止取流线程
 2mStreamStart = false;
 3if (null != mStreamThread) {
 4    try {
 5        mStreamThread.join();
 6    } catch (InterruptedException e) {
 7        e.printStackTrace();
 8    }
 9    mStreamThread = null;
10}
11
12// 停止彩色流
13if (mColorStream != null) {
14    mColorStream.stop();
15}
16
17// 停止深度流
18if (mDepthStream != null) {
19    mDepthStream.stop();
20}
9.资源释放
 1try {
 2    // 释放StreamReader
 3    if (null != mStreamReader) {
 4        mStreamReader.destroy();
 5        mStreamReader = null;
 6    }
 7
 8    // 释放StreamSet
 9    if (null != mStreamSet) {
10        mStreamSet.close();
11    }
12} catch (Exception e) {
13    Log.w(TAG, "deInitCamera: " + e.getMessage());
14}
15
16// 释放SDK资源
17if (null != mAstraContext) {
18    mAstraContext.terminate();
19    mAstraContext = null;
20}
Orbbec SDK
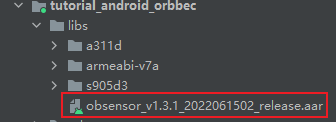
要使用Orbbec SDK,首先需要导入Orbbec SDK的aar包到您的应用工程中的lib目录下,导入后记得点击Sync Project with Gradle Files进行更新, 具体如图所示:
SDK使用示例
1.初始化SDK并设置设备监听
 1// 初始化SDK
 2mOBContext = new OBContext(mContext, new DeviceChangedCallback() {
 3        @Override
 4        public void onDeviceAttach(DeviceList deviceList) {
 5            // 设备连接回调
 6            try {
 7                // 释放deviceList资源
 8                deviceList.close();
 9            } catch (Exception e) {
10                Log.e(TAG, "onDeviceAttach: " + e.getMessage());
11            }
12        }
13
14        @Override
15        public void onDeviceDetach(DeviceList deviceList) {
16            // 设备断开连接回调
17            try {
18                // 重要提示,如果断开连接的设备是当前创建的Device,
19                // 务必要在此处释放Device和Pipeline资源,以及与之相关的任何需要释放的资源
20
21                // 释放deviceList资源
22                deviceList.close();
23            } catch (Exception e) {
24                Log.e(TAG, "onDeviceDetach: " + e.getMessage());
25            }
26        }
27    });
2.创建Device并通过Device创建Pipeline
1if (null == mPipeline) {
2    // 通过回调上来的deviceList创建Device
3    mDevice = deviceList.getDevice(0);
4
5    // 通过Device创建Pipeline
6    mPipeline = new Pipeline(mDevice);
7}
3.配置开流相关信息
 1// 创建Config
 2mConfig = new Config();
 3
 4// 配置开启硬件D2C
 5mConfig.setAlignMode(AlignMode.ALIGN_D2C_HW_ENABLE);
 6
 7
 8StreamProfile colorStreamProfile = null;
 9StreamProfile depthStreamProfile = null;
10// 获取彩色流配置列表
11StreamProfileList colorProfileList = mPipeline.getStreamProfileList(SensorType.COLOR);
12
13// 获取深度流配置列表
14StreamProfileList depthProfileList = mPipeline.getStreamProfileList(SensorType.DEPTH);
15
16if (null != colorProfileList) {
17    // 根据分辨率、格式、帧率获取指定的彩色流配置
18    colorStreamProfile = colorProfileList.getVideoStreamProfile(colorW, colorH, Format.RGB888, FPS);
19    colorProfileList.close();
20}
21if (null != colorStreamProfile) {
22    // 使能指定的彩色流配置
23    mConfig.enableStream(colorStreamProfile);
24    Log.i(TAG, "initCamera: " + printStreamProfile(colorStreamProfile.as(StreamType.VIDEO)));
25    colorStreamProfile.close();
26}
27
28if (null != depthProfileList) {
29    // 根据分辨率、格式、帧率获取指定的深度流配置
30    depthStreamProfile = depthProfileList.getVideoStreamProfile(RESOLUTION_W, RESOLUTION_H, Format.Y16, FPS);
31    depthProfileList.close();
32}
33if (null != depthStreamProfile) {
34    // 使能指定的深度流配置
35    mConfig.enableStream(depthStreamProfile);
36    Log.i(TAG, "initCamera: " + printStreamProfile(depthStreamProfile.as(StreamType.VIDEO)));
37    depthStreamProfile.close();
38}
39if (null != mDevice) {
40    // 关闭自动曝光优先以提高帧率
41    if (mDevice.isPropertySupported(DeviceProperty.OB_PROP_COLOR_AUTO_EXPOSURE_PRIORITY_INT, OB_PERMISSION_WRITE)) {
42        mDevice.setPropertyValueI(DeviceProperty.OB_PROP_COLOR_AUTO_EXPOSURE_PRIORITY_INT, 0);
43    }
44}
45
46// 开启帧同步
47try {
48    mPipeline.enableFrameSync();
49} catch (Exception e) {
50    Log.w(TAG, "initCamera: " + e.getMessage());
51}
4.创建FrameSet回调并通过Pipeline开流
1// 创建FrameSet回调,在该回调中尽量不要处理较多耗时操作,否则可能导致SDK内部出现丢帧情况
2private FrameSetCallback mFrameSetCallback = (frameSet) -> {
3    // frameSet资源释放
4    frameSet.close();
5};
6
7// 通过Config的配置进行开流
8mPipeline.start(mConfig, mFrameSetCallback);
5.获取相机内参
1if (null != mPipeline) {
2    mCameraParam = mPipeline.getCameraParam();
3}
6.停流
1if (null != mPipeline) {
2    mPipeline.stop();
3}
7.资源释放
 1// 释放Config资源
 2if (null != mConfig) {
 3    mConfig.close();
 4    mConfig = null;
 5}
 6// 释放Pipeline资源
 7if (null != mPipeline) {
 8    mPipeline.close();
 9    mPipeline = null;
10}
11// 释放Device资源
12if (null != mDevice) {
13    mDevice.close();
14    mDevice = null;
15}
16// 释放SDK资源
17if (null != mOBContext) {
18    mOBContext.close();
19    mOBContext = null;
20}
算法SDK
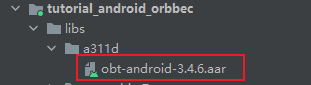
要使用Orbbec Pose SDK,首先需要导入Orbbec Pose SDK的aar包到您的应用工程中的lib目录下,导入后记得点击Sync Project with Gradle Files进行更新, 具体如图所示:
SDK使用示例
1.设置License并初始化SDK
 1try {
 2    // 将申请的License中的appKey, appSecret, authCode设置进来
 3    Obt.setLicense(appKey, appSecret, authCode);
 4
 5    // 创建SDK并进行初始化,如果License激活失败则抛异常
 6    mObtContext = new ObtAndroidContext(context);
 7    mObtContext.initialize();
 8} catch (Exception e) {
 9    Log.w(TAG, "init: " + e.getMessage());
10}
2.创建Tracker
1mTracker = Tracker.create();
3.通过获取到的相机内参构建Calibration并进行设置
 1// 通过AstraSDK获取到的相机内参构建Calibration的方式
 2private Calibration loadCalibration(OrbbecCameraParams cameraParam, boolean isRotate) {
 3    if (null == cameraParam) {
 4        Log.w(TAG, "loadCalibration: CameraParam is null, use default calibration!");
 5        return (isRotate ? GlobalDef.CALIBRATION_ROTATE : GlobalDef.CALIBRATION);
 6    }
 7    Calibration calibration = new Calibration();
 8    float[] l_intr_p = cameraParam.l_intr_p;
 9    calibration.colorWidth = isRotate ? RESOLUTION_H : RESOLUTION_W;
10    calibration.colorHeight = isRotate ? RESOLUTION_W : RESOLUTION_H;
11    calibration.depthWidth = isRotate ? RESOLUTION_H : RESOLUTION_W;
12    calibration.depthHeight = isRotate ? RESOLUTION_W : RESOLUTION_H;
13    calibration.depthUnit = DepthUnit.DEPTH_1_MM.toNative();
14
15    calibration.fx = isRotate ? l_intr_p[1] : l_intr_p[0];
16    calibration.fy = isRotate ? l_intr_p[0] : l_intr_p[1];
17    calibration.cx = isRotate ? l_intr_p[3] : l_intr_p[2];
18    calibration.cy = isRotate ? l_intr_p[2] : l_intr_p[3];
19
20    if (calibration.fx <= 0 || calibration.fy <= 0 || calibration.cx <= 0 || calibration.cy <= 0 ||
21            Float.isNaN(calibration.fx) || Float.isNaN(calibration.fy) || Float.isNaN(calibration.cx) || Float.isNaN(calibration.cy)) {
22        return (isRotate ? GlobalDef.CALIBRATION_ROTATE : GlobalDef.CALIBRATION);
23    }
24
25    Log.d(TAG, "loadCalibration: fx:" + calibration.fx + " fy:" + calibration.fy +
26            " cx:" + calibration.cx + " cy:" + calibration.cy +
27            " colorWidth:" + calibration.colorWidth + " colorHeight:" + calibration.colorHeight +
28            " depthWidth:" + calibration.depthWidth + " depthHeight:" + calibration.depthHeight +
29            " depthUnit:" + calibration.depthUnit);
30    return calibration;
31}
32
33// 通过OrbbecSDK获取到的相机内参构建Calibration的方式
34private Calibration loadCalibration(CameraParam cameraParam, boolean isRotate) {
35    if (null == cameraParam) {
36        Log.w(TAG, "loadCalibration: CameraParam is null, use default calibration!");
37        return (isRotate ? GlobalDef.CALIBRATION_ROTATE : GlobalDef.CALIBRATION);
38    }
39    // 获取彩色相机内参
40    CameraIntrinsic colorIntrinsic = cameraParam.getColorIntrinsic();
41    // 获取深度相机内参
42    CameraIntrinsic depthIntrinsic = cameraParam.getDepthIntrinsic();
43    Calibration calibration = new Calibration();
44    calibration.colorWidth = isRotate ? colorIntrinsic.getHeight() : colorIntrinsic.getWidth();
45    calibration.colorHeight = isRotate ? colorIntrinsic.getWidth() : colorIntrinsic.getHeight();
46    calibration.depthWidth = isRotate ? depthIntrinsic.getHeight() : depthIntrinsic.getWidth();
47    calibration.depthHeight = isRotate ? depthIntrinsic.getWidth() : depthIntrinsic.getHeight();
48    calibration.depthUnit = DepthUnit.DEPTH_1_MM.toNative();
49
50    calibration.fx = isRotate ? depthIntrinsic.getFy() : depthIntrinsic.getFx();
51    calibration.fy = isRotate ? depthIntrinsic.getFx() : depthIntrinsic.getFy();
52    calibration.cx = isRotate ? depthIntrinsic.getCy() : depthIntrinsic.getCx();
53    calibration.cy = isRotate ? depthIntrinsic.getCx() : depthIntrinsic.getCy();
54
55    if (calibration.fx <= 0 || calibration.fy <= 0 || calibration.cx <= 0 || calibration.cy <= 0 ||
56            Float.isNaN(calibration.fx) || Float.isNaN(calibration.fy) || Float.isNaN(calibration.cx) || Float.isNaN(calibration.cy)) {
57        return (isRotate ? GlobalDef.CALIBRATION_ROTATE : GlobalDef.CALIBRATION);
58    }
59
60    Log.d(TAG, "loadCalibration: fx:" + calibration.fx + " fy:" + calibration.fy +
61            " cx:" + calibration.cx + " cy:" + calibration.cy +
62            " colorWidth:" + calibration.colorWidth + " colorHeight:" + calibration.colorHeight +
63            " depthWidth:" + calibration.depthWidth + " depthHeight:" + calibration.depthHeight +
64            " depthUnit:" + calibration.depthUnit);
65    return calibration;
66}
67
68// 设置Calibration到算法模块
69mTracker.setCalibration(mCalibration);
4.设置跟踪模式
1mTracker.setMode(mTrackMode);
5.创建并启动跟踪线程
1mPoseTrackerThread = new Thread(mPoseTrackerRunnable);
2mPoseTrackerThread.setName("PoseTrackerThread");
3mIsTracking = true;
4mPoseTrackerThread.start();
6.算法数据封装
1// 彩色Image封装
2Image colorImage = Image.create(ImageFormat.RGB888, w, h, stride, data);
3// 深度Image封装
4Image depthImage = Image.create(ImageFormat.DEPTH16, w, h, stride, data);
5
6//使用完后记得资源释放
7colorImage.release();
8depthImage.release();
7.算法处理
1if (mSkeletonMode == GlobalDef.SKELETON_3D) {
2    // 3D骨架模式
3    frame = mTracker.process(colorImage, depthImage);
4} else {
5    // 2D骨架模式
6    frame = mTracker.process(colorImage);
7}
8// frame结果使用完后记得资源释放
9frame.release();
8.设置算法滤波参数
1mTracker.setSmoothingFactor(smoothingFactor);
9.资源释放
 1// 释放Tracker资源
 2if (null != mTracker) {
 3    mTracker.release();
 4    mTracker = null;
 5}
 6
 7// 释放SDK资源
 8if (null != mObtContext) {
 9    mObtContext.terminate();
10    mObtContext = null;
11}